 Save
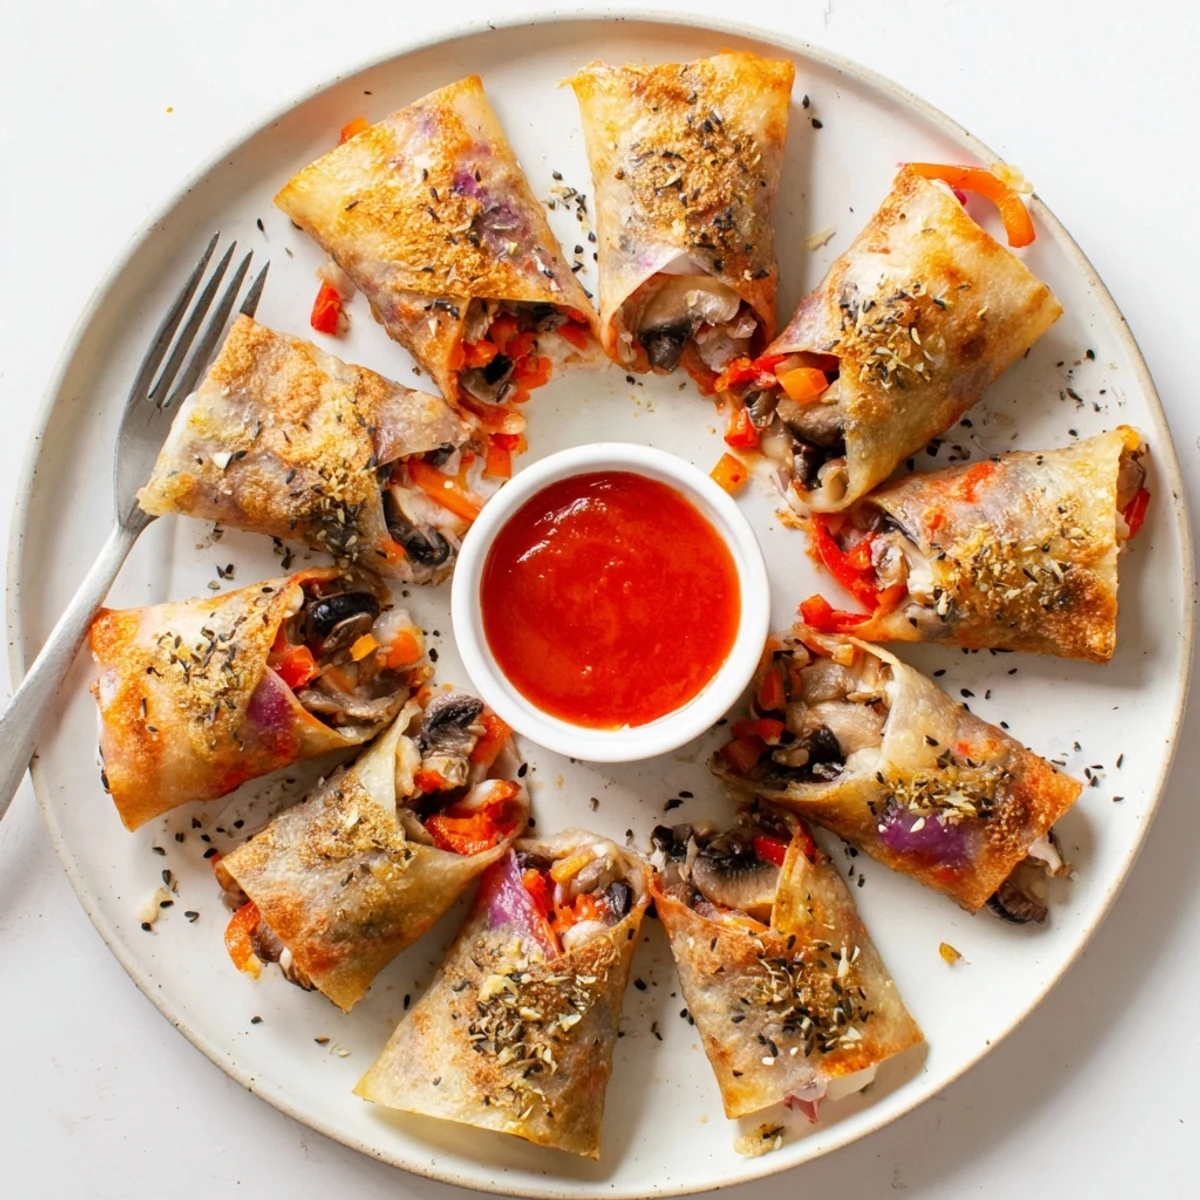
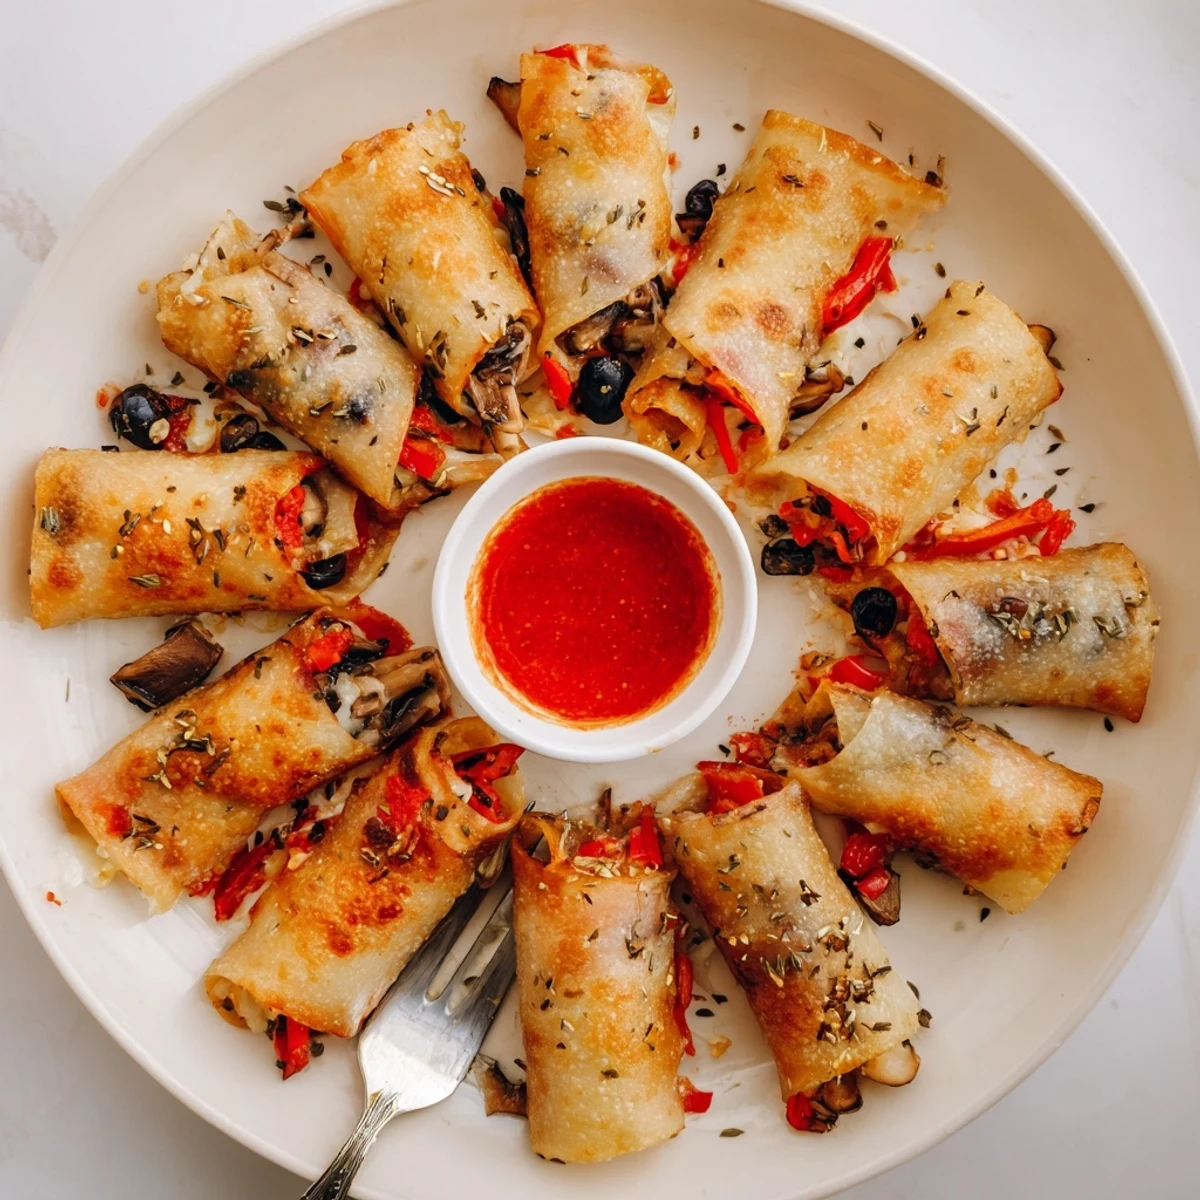
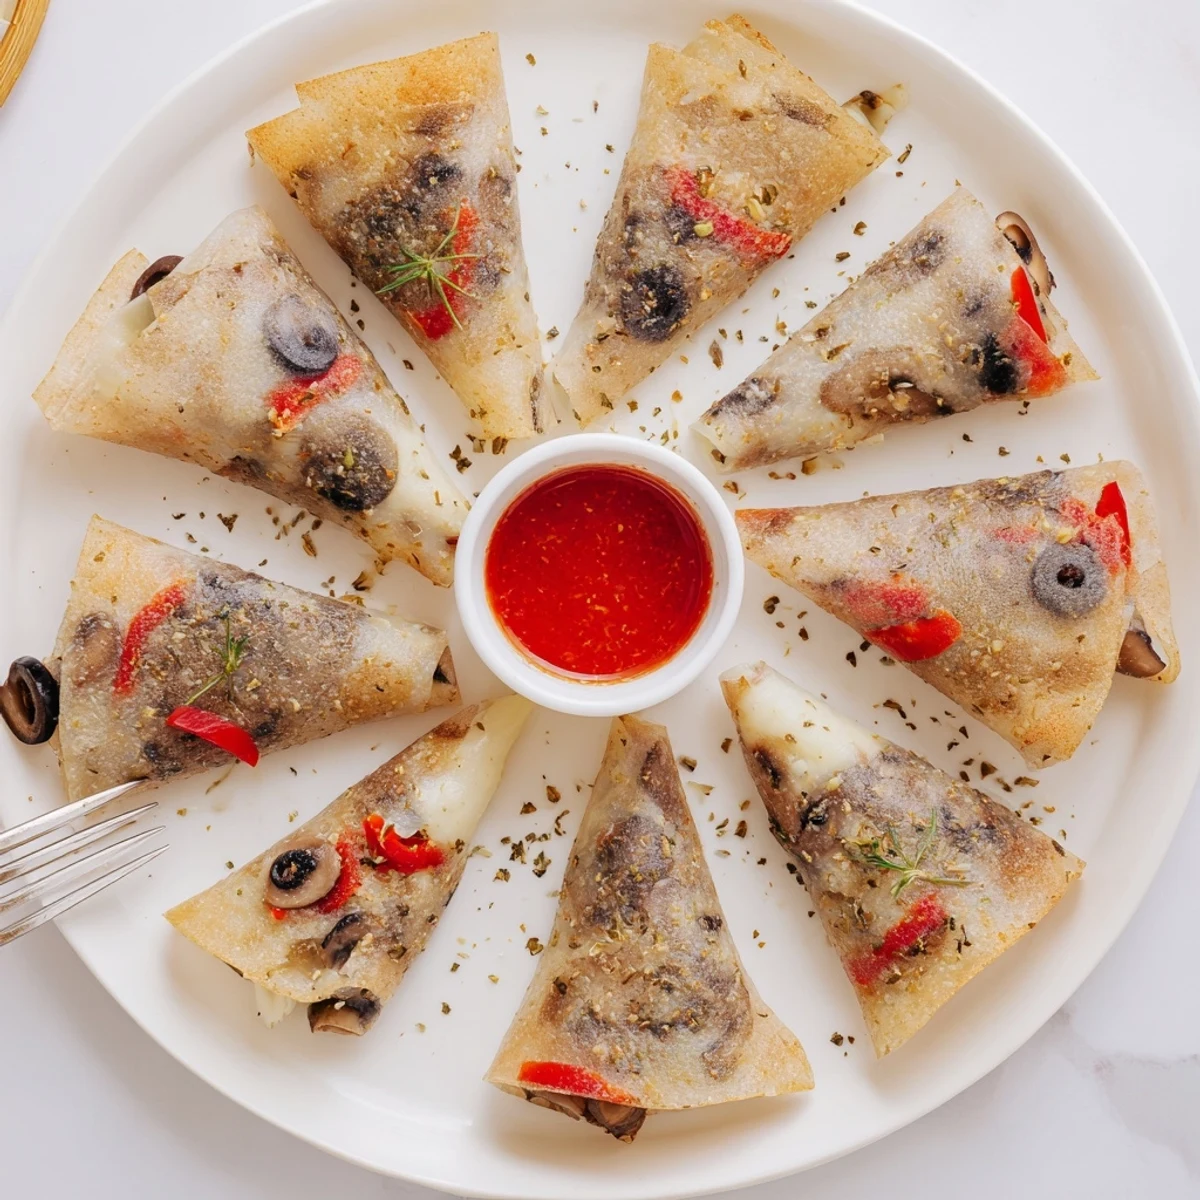
Save These rice paper rolls combine the satisfying crunch of spring rolls with everyone's favorite pizza flavors. The magic happens when soft rice paper wrappers hit a hot skillet, creating an irresistibly crispy exterior while keeping the melty cheese and savory vegetables inside perfectly tender.
Each roll packs mozzarella, bell peppers, mushrooms, olives, and a zesty pizza sauce into handheld portions ideal for snacking or starting a meal. The quick pan-frying technique delivers golden results without deep frying, making these lighter than typical appetizers yet still completely indulgent.
Ready in just over half an hour, these rolls work beautifully as party food, after-school snacks, or a creative way to use up leftover pizza toppings. Serve them warm with extra sauce for dipping, and watch them disappear fast.
The first time I made these, my roommate walked into the kitchen looking completely bewildered. She'd seen me soaking rice paper for spring rolls a hundred times, but watching me pile mozzarella and pepperoni inside made her pause in the doorway. We stood there together watching them sizzle in the pan, both of us skeptical until that first crispy, melty bite. Now they're the thing we make when we want comfort food but need to use up whatever toppings are languishing in the fridge.
Last winter during a snowed-in weekend, my niece and I turned these into an assembly line operation. She'd carefully arrange the vegetables while I handled the rolling, and we ended up with the most beautifully mismatched collection of rolls. Some had way too many olives, others were basically just cheese, but pulling that tray out of the oven together felt like a tiny victory against the grey weather outside.
Ingredients
- 12 rice paper sheets: These become the most incredible crispy wrapper you've ever tasted, way lighter than dough
- 1 cup shredded mozzarella cheese: The melt factor here is non-negotiable—vegan cheese works too if you find a melty one
- 1/2 cup pizza sauce or marinara: Get it right onto the rice paper before anything else, it helps bind everything together
- 1/2 cup sliced black olives: These little salty pockets make every bite interesting
- 1/2 cup diced bell pepper: Any color works, but red adds such a gorgeous sweetness against the savory cheese
- 1/2 cup sliced mushrooms: They release moisture as they cook, keeping the inside from getting too dry
- 1/4 cup finely chopped red onion: Small dice is key here, you don't want big chunks that can tear through the delicate wrapper
- 1/2 tsp dried oregano: Sprinkle this over everything—it's what makes it taste legitimately like pizza
- 1/4 tsp crushed red pepper flakes: Optional unless you're me, then they're mandatory
- 2 tbsp olive oil: For pan-frying, though you can absolutely bake them if you prefer
Instructions
- Set up your rolling station:
- Get a large shallow bowl with warm water, a damp kitchen towel laid flat on your counter, and all your filling ingredients prepped and within reach before you start.
- Soak the rice paper:
- Dip one sheet into the warm water for 5–10 seconds until it's pliable but not falling apart, then immediately lay it flat on your damp towel.
- Layer the sauce:
- Spread about 1 teaspoon of pizza sauce right in the center, leaving a generous border around the edges.
- Add your toppings:
- Pile on a small handful of mozzarella, then scatter olives, bell pepper, mushrooms, and onion on top.
- Sprinkle the seasonings:
- Finish with oregano and red pepper flakes if you like things with a little kick.
- Roll it up:
- Fold in the sides first, then roll from the bottom up like you're making a burrito—tight but gentle so you don't tear the paper.
- Repeat and roll:
- Keep going until all your rice paper sheets are filled and rolled, placing them seam-side down on a plate.
- Get your pan hot:
- Heat olive oil in a large nonstick skillet over medium heat until it shimmers slightly.
- Fry until golden:
- Cook the rolls seam-side down first, then flip after 2–3 minutes when they're crispy and golden.
- Cool and serve:
- Let them rest for a couple minutes so the cheese sets up slightly, then serve with extra pizza sauce on the side for dunking.
 Save
Save My friend's kids were initially suspicious of these odd-looking rolls, calling them 'pizza sushi' with a mixture of curiosity and distrust. Watching their expressions change from wary to delighted after that first bite was honestly the best part of the whole evening. Now they request them by name whenever they come over, and I've learned to make double batches because they disappear faster than I can cook them.
Filling Variations That Work
I've found that the best fillings are ones that aren't too wet—fresh tomatoes, for instance, can make the rolls soggy before they even hit the pan. Pre-cooked vegetables work beautifully, and anything that you'd normally put on a pizza is fair game. The rice paper is so neutral that it really lets whatever you stuff inside shine through.
Pan-Fry Versus Bake
There's something deeply satisfying about the shatter-crisp you get from pan-frying, but baking is a perfectly solid option if you're feeding a crowd. Brush the rolls with oil and bake at 400°F for about 12 minutes, flipping once halfway through. You'll get a slightly different texture—more evenly crispy all over rather than having those gorgeous fried spots—but they're still absolutely delicious.
Make-Ahead Strategy
You can absolutely roll these ahead of time and keep them between layers of parchment paper in the fridge for a few hours before cooking. Just cover them with a slightly damp towel so they don't dry out and get brittle. I've done this for parties and it's such a relief to have the prep work done beforehand, leaving me free to actually hang out with people instead of being stuck at the stove rolling rice paper while everyone else is having fun.
- Roll them a few hours ahead but cook right before serving for optimal crispiness
- If you're storing leftovers, reheat in a toaster oven to restore the crunch
- These reheat surprisingly well the next day, though the texture will be slightly less crispy
 Save
Save These little rolls have become my go-to for those nights when takeout sounds too heavy but I still want something deeply satisfying. They're quick enough for a weeknight but feel special enough for guests, and there's something genuinely joyful about biting into crispy, cheesy pizza in a completely unexpected format.
Common Recipe Questions
- → What makes rice paper get crispy?
-
When rice paper hits hot oil in a skillet, the moisture evaporates quickly and the starches set into a crunchy texture. Pan-frying creates that satisfying golden crispness while keeping the interior tender and chewy.
- → Can I bake these instead of frying?
-
Absolutely. Brush the rolls lightly with oil and bake at 400°F (200°C) for 12–15 minutes, turning once halfway through. The texture will be slightly less crispy than pan-fried but still delicious with less fat.
- → How do I prevent rice paper from tearing?
-
Don't oversoak the rice paper—just 5–10 seconds in warm water makes it pliable without becoming fragile. Work on a damp towel to prevent sticking, and roll tightly but gently without pulling the paper too hard.
- → Can I make these ahead of time?
-
You can assemble the rolls up to 4 hours ahead and store them separated by parchment paper in the refrigerator. For best results, cook them just before serving to maintain the crispy texture. They reheat well in a 350°F oven for 5–10 minutes.
- → What other fillings work well?
-
These rolls are incredibly versatile. Try pepperoni, cooked sausage, spinach, fresh basil, sun-dried tomatoes, artichokes, or different cheese varieties. Just keep fillings finely chopped and not too wet to prevent sogginess during cooking.
- → Are rice paper wrappers gluten-free?
-
Most rice paper wrappers are naturally gluten-free since they're made from rice flour, water, and salt. However, always check the package to confirm, as some brands may include wheat or process in facilities with gluten-containing products.