 Save
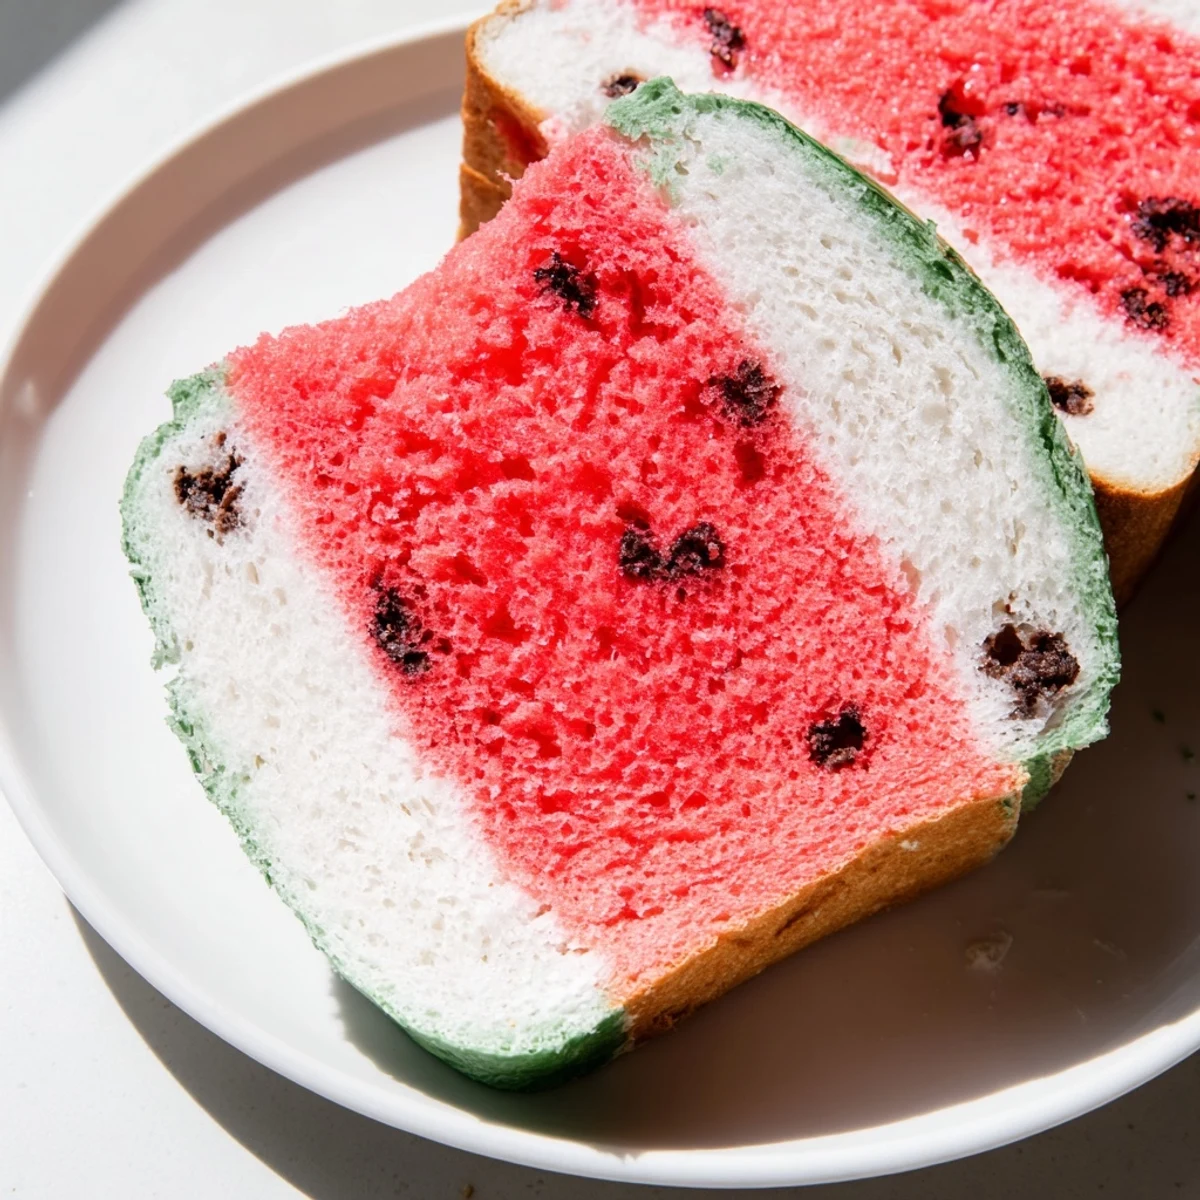
Save This playful bread transforms classic dough into a watermelon masterpiece with three distinct colored layers. The red-tinted interior gets studded with mini chocolate chips mimicking seeds, while white and green outer rings create the authentic rind appearance. The subtle sweetness and tender texture make it ideal for toasting with butter, crafting unique sandwiches, or serving as a conversation-starting treat at summer parties and children's gatherings.
My daughter spotted this recipe on a Saturday morning and begged me to help her bake something that looked like her favorite summer fruit. The kitchen got colorful that day, with food coloring staining our fingers and flour dusting every surface. When we sliced into the finished loaf, her squeal of delight made all the mess worth it. Now it's our go-to for bringing something unexpected to summer potlucks.
Last summer, I brought a loaf to my neighbors birthday party. Her kids spent ten minutes examining the slice on their plates, convinced Id somehow baked an actual watermelon into bread form. The bread disappeared faster than the birthday cake, and Ive had requests for it at every gathering since.
Ingredients
- Bread flour: Higher protein content than all purpose gives this bread structure and that tender springy crumb that holds up beautifully to slicing
- Active dry yeast: This amount works perfectly for the flour quantity, just make sure your milk is warm but not hot or youll kill the yeast before it can work
- Warm milk: 110°F is the sweet spot, test it on your wrist like babys milk, too cool and dough rises slowly, too hot and yeast dies
- Unsalted butter: Softened to room temperature helps it incorporate evenly into the dough, adding richness without overwhelming the subtle sweetness
- Cocoa powder: Just enough to give the white rind portion a creamy natural color, use dutch process for deeper color
- Matcha powder or green food coloring: Matcha adds a subtle earthy flavor alongside the green hue but gel coloring gives more vibrant results
- Red or pink gel food coloring: Gel coloring is more concentrated than liquid so you need less, which keeps the dough texture consistent
- Watermelon extract: This is optional but really does add that authentic fruity note, otherwise the bread is more subtly sweet than distinctly watermelon flavored
- Mini chocolate chips: These create the perfect seed appearance throughout the pink portion, regular chips would be too large and disruptive to the crumb
Instructions
- Mix the base dough:
- Combine flour, sugar, yeast, and salt in your stand mixer or large bowl, then pour in the warm milk, egg, and softened butter. Mix until everything comes together into a shaggy ball, then knead on medium speed for 8 to 10 minutes until the dough is smooth, elastic, and passes the windowpane test when stretched.
- Divide and color:
- Weigh your dough and split it into three portions, about 60% for the pink flesh, 25% for the white rind, and 15% for the green skin. Add red coloring and extract to the largest portion, kneading until the color is completely uniform, then fold in the chocolate chips. Leave the middle portion plain and work green coloring or matcha into the smallest ball.
- First rise:
- Place each colored dough ball into its own greased bowl, cover with plastic wrap or a warm towel, and let rise in a draft free spot for about an hour. The dough should double in size and feel puffy and alive when you gently press it with a finger.
- Shape the loaf:
- Punch down each portion and roll the red dough into a log the length of your loaf pan. Flatten the white dough and wrap it around the red log, then do the same with the green dough, pinching the seams tightly to seal everything together. Place the whole loaf seam side down in your greased 9x5 inch pan.
- Second rise and bake:
- Cover the pan and let the loaf rise for another 30 to 45 minutes until its puffy and domed above the pan edges. Bake at 350°F for 30 to 35 minutes, tenting with foil after 20 minutes if the top is browning too quickly, until the loaf sounds hollow when tapped on the bottom.
 Save
Save I learned this lesson the hard way when I couldn't wait and sliced into a warm loaf, ending up with a beautiful but slightly squished cross section. Now I plan ahead and bake this the night before I need it, letting it cool completely on a wire rack before wrapping it up. The patience pays off in those perfect picture ready slices.
Making The Colors Pop
Gel food coloring really does make a difference here, especially for the red and green portions. Liquid coloring can make your dough sticky and throw off the hydration balance, requiring you to add more flour and potentially toughening the final bread. Start with less coloring than you think you need and add more gradually, remembering that the colors will deepen slightly during baking. A toothpick dipped in gel coloring gives you more control than pouring from a bottle.
Working With Colored Dough
Kneading food coloring into dough can be surprisingly messy and may leave your hands stained for a day or two. Wear gloves if you care about your manicure, or embrace it as part of the experience. The best technique is to make a well in the center of your dough ball, add the coloring there, and fold the edges over it repeatedly, working from the outside in. This keeps the color contained until its distributed and prevents it from ending up all over your work surface.
Serving And Storage
This bread makes the most amazing French toast, especially when you serve it with fresh watermelon on the side for a thematic breakfast. The chocolate chips melt slightly and create these lovely pockets throughout each slice. For storage, wrap the cooled loaf tightly in plastic wrap or keep it in an airtight container at room temperature, where it will stay fresh for about three days. After that, consider slicing and freezing it for up to a month.
- Try toasting leftovers and spreading with a little cream cheese for an afternoon snack
- The bread also freezes beautifully if you wrap individual slices in plastic before freezing
- If the crust gets a bit soft after storage, a quick pass in the toaster revives it beautifully
 Save
Save Theres something magical about bread that looks like one thing and tastes like another, bringing surprise and delight to the table. I hope this recipe becomes as much of a conversation starter in your kitchen as it has in mine.
Common Recipe Questions
- → What does watermelon bread taste like?
-
The bread features a subtly sweet, tender crumb with hints of vanilla or watermelon extract depending on your preference. The chocolate chips add occasional bursts of richness throughout the soft, pillowy texture.
- → Can I make this without food coloring?
-
You can use natural alternatives like beet juice for pink, matcha for green, or simply omit coloring for a more subtle appearance. The flavors remain excellent regardless of color intensity.
- → How long does watermelon bread stay fresh?
-
Store in an airtight container at room temperature for up to 3 days. For longer storage, slice and freeze individual portions for up to 3 months, thawing as needed.
- → Why is the rising time so long?
-
The total time includes two rising periods: one initial hour for the colored dough portions to double, then 30-45 minutes after shaping. This ensures proper texture and helps the distinct layers maintain their structure during baking.
- → Can I use active dry yeast instead of instant?
-
Yes, active dry yeast works perfectly. Just dissolve it in the warm milk first for about 5 minutes until foamy, then proceed with mixing the dough as directed.
- → What if I don't have a stand mixer?
-
Hand kneading works beautifully for this dough. Mix ingredients in a large bowl, then turn onto a floured surface and knead by hand for 10-12 minutes until smooth and elastic before dividing and coloring.