 Save
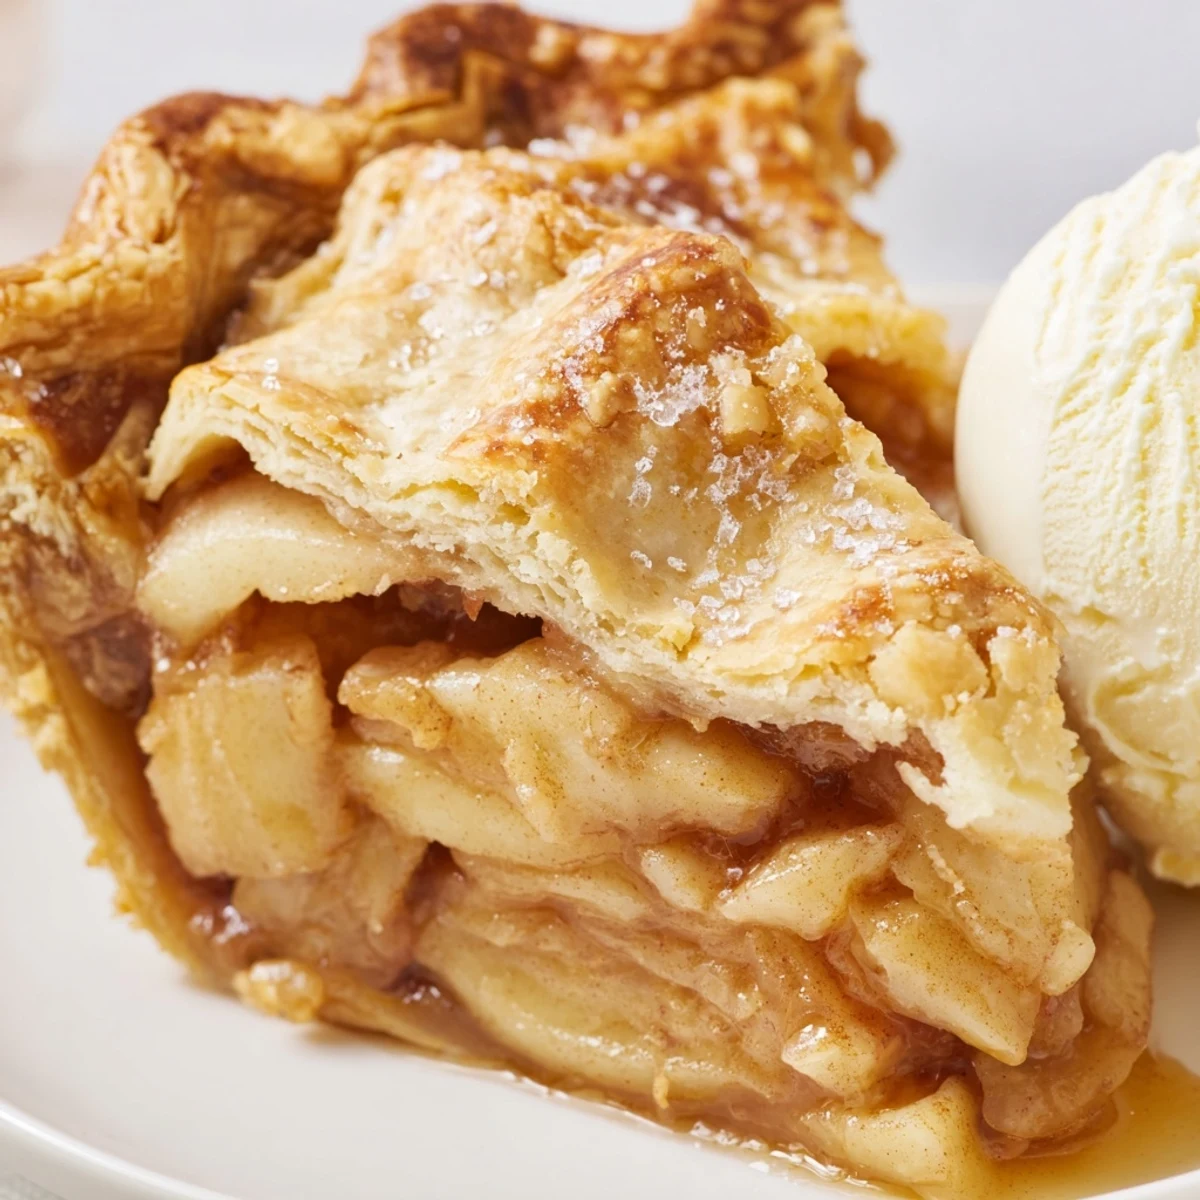
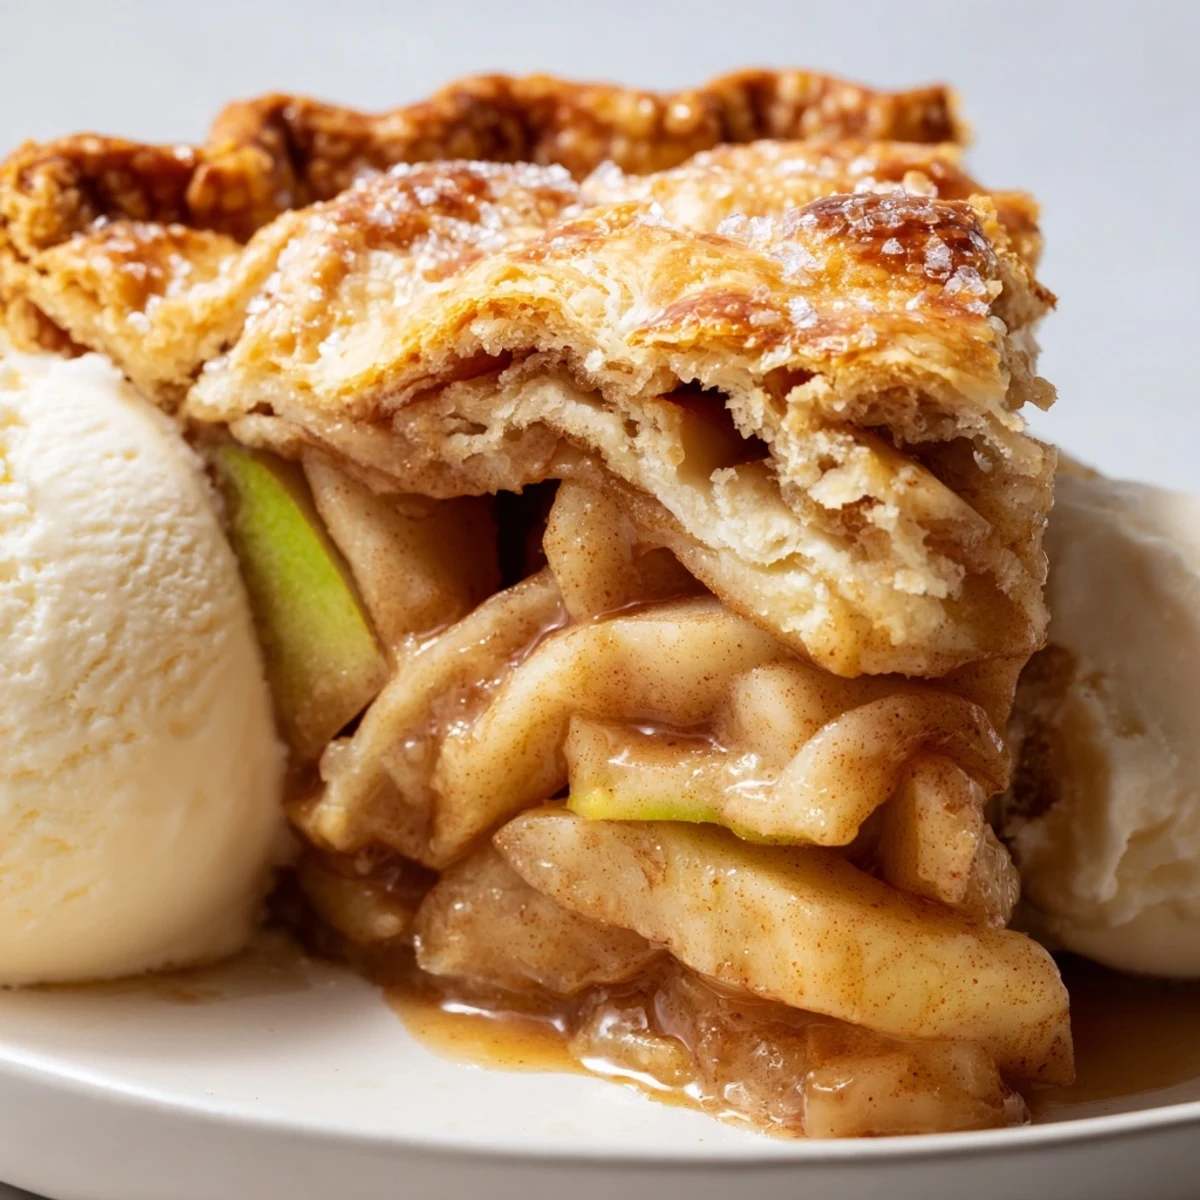
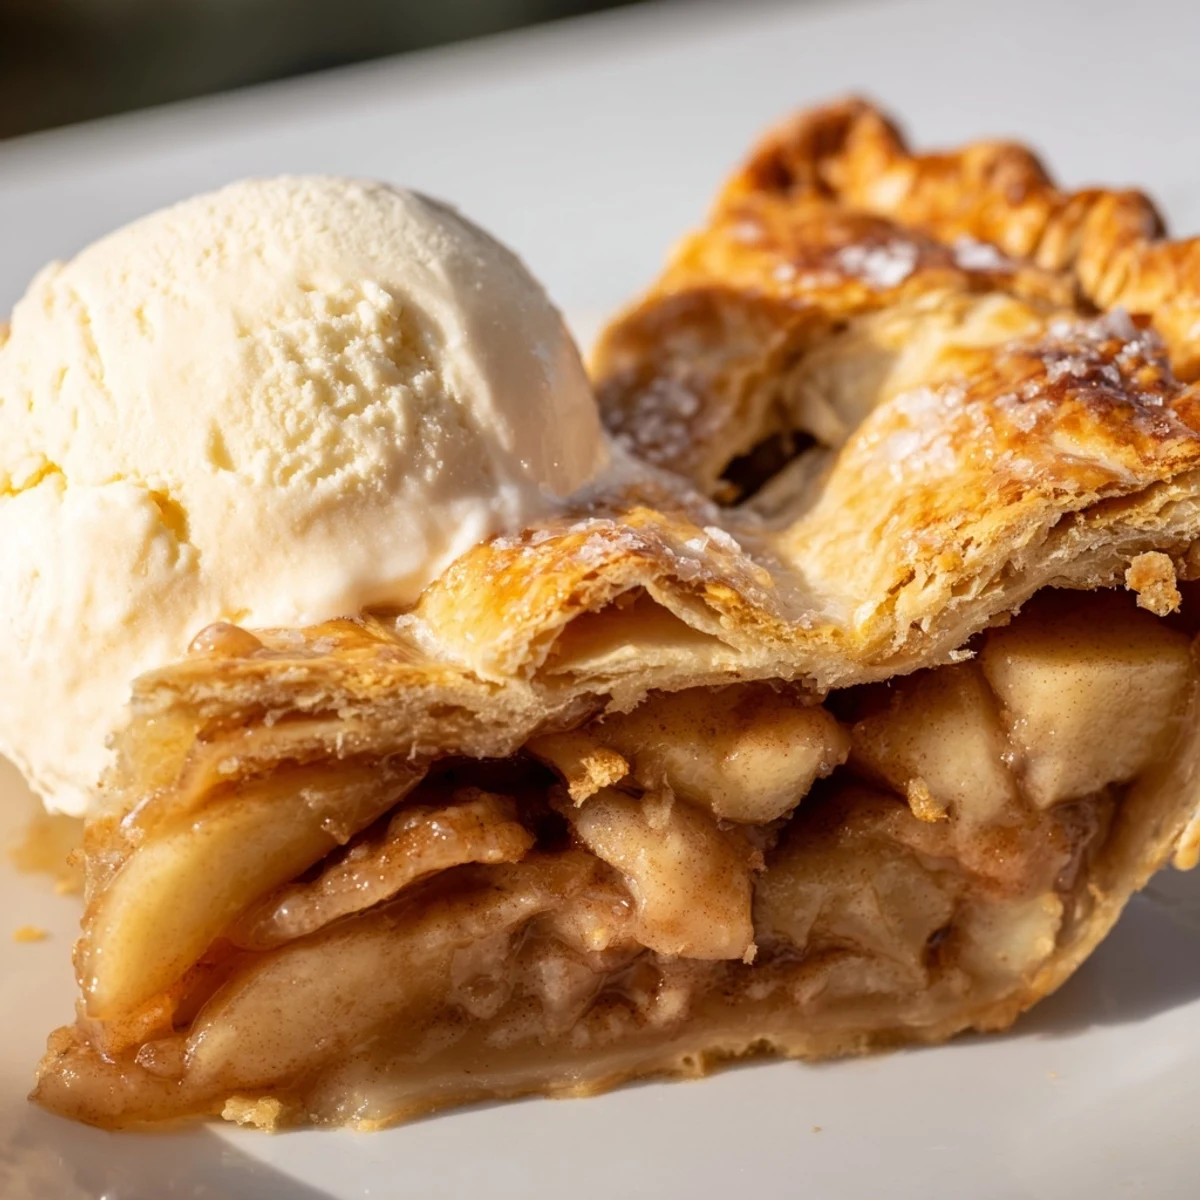
Save This beloved American dessert combines tart apples with warm spices like cinnamon, nutmeg, and cloves, all nestled inside a tender, flaky pastry crust. The filling uses Granny Smith apples for the perfect balance of sweet and tart, while the handmade butter crust bakes up golden and crisp. After about an hour in the oven, the crust turns beautifully browned and the apple filling becomes bubbling and fragrant. Let it cool for two hours to set before slicing—though it's absolutely delicious served warm with a scoop of vanilla ice cream melting over the top.
The windows had been steamed up for hours, and that unmistakable cinnamon scent was practically pulling neighbors from their driveways. I'd been wrestling with pie crusts for years, always ending up with something that tasted fine but looked like it had survived a natural disaster. This particular afternoon, watching my grandmother's hands work through the dough, something finally clicked about temperature and patience.
My college roommate once walked in while I was pulling this pie from the oven, dropped her backpack in the hallway, and simply stood there inhaling. We ended up eating half of it standing at the counter with forks, steam rising from each slice, talking about everything and nothing until the kitchen went dark. That's the thing about apple pie—it creates its own moments.
Ingredients
- All-purpose flour: The backbone of both crust and filling, providing structure and thickening power in all the right places
- Unsalted butter: Keep it ice cold, seriously, this is what creates those magical flaky layers that shatter when you take a bite
- Tart apples: Granny Smiths hold their shape beautifully and provide that perfect contrast to the sweet spiced filling
- Granulated and brown sugar: The brown sugar adds deep caramel notes while white sugar provides straightforward sweetness
- Ground cinnamon: The nonnegotiable spice that makes everything smell like comfort and home
- Lemon juice: A little brightness that cuts through all that sugar and keeps the apples from turning brown
Instructions
- Make the pie crust dough:
- Whisk flour, salt, and sugar in a large bowl, then work in cold butter until you have coarse crumbs with some pea sized pieces remaining. Sprinkle ice water over the mixture, gently folding until the dough holds together when squeezed. Divide into two discs, wrap tightly, and let chill in the fridge for at least an hour—the cold is your best friend here.
- Prepare the apple filling:
- Toss those sliced apples with both sugars, flour, lemon juice, cinnamon, nutmeg, cloves, and salt until every piece is thoroughly coated. Let it sit while you roll out the dough, which will start drawing out some of the apple juices and help create that perfect consistency.
- Roll and assemble:
- Roll one dough disc into a 12 inch circle on a floured surface, easing it gently into your pie dish. Pour in the apple mixture and dot the top with those small butter pieces. Roll out the second disc and place it over the apples, then trim, fold, and crimp the edges until they look beautifully rustic. Cut several vents in the top crust so steam can escape, otherwise you'll end up with a messy overflow situation.
- Add the finishing touches and bake:
- Brush the top crust with egg wash and sprinkle with coarse sugar if you want that bakery shine. Bake at 425°F for 20 minutes, then reduce to 375°F and continue for another 35 to 40 minutes until the crust is deeply golden and you can see the filling bubbling through the vents. This cooling period is absolutely essential, so let it rest for at least 2 hours or the filling will run everywhere.
 Save
Save Last Thanksgiving, my usually skeptical father took one bite and announced this was better than his grandmother's recipe, which I'm pretty sure was the highest compliment he's ever paid me. The table went quiet for a moment as everyone focused on their plates, forks scraping against plates, little murmurs of appreciation. That's the power of a really good apple pie.
Making It Your Own
I've found that adding a handful of golden raisins or a splash of Calvados brandy to the filling creates this sophisticated depth that people can't quite identify but absolutely love. The raisins plump up and become these little pockets of concentrated sweetness while the alcohol evaporates, leaving behind just this whisper of warmth. Sometimes I swap out half the white flour for whole wheat in the crust, which adds a nutty earthiness that pairs unexpectedly well with the sweet spiced apples.
The Temperature Game
Cold ingredients and a hot oven are the secret weapons here. The cold butter creates steam pockets in the dough as it bakes, which translates to those coveted flaky layers. Starting at a higher temperature of 425°F helps set the crust structure quickly, preventing soggy bottoms, before finishing at a moderate heat to cook the apples through without burning. Every kitchen runs differently, but I've learned that visual cues trump timers every single time.
Serving and Storage
This pie needs those two hours of cooling time to truly come together—the filling needs to set properly or you'll end up with apple soup instead of neat slices. I've made the mistake of cutting too early and learned my lesson, though my family didn't seem to mind eating the messy version. Once completely cooled, the pie can sit at room temperature for a day, loosely covered, or refrigerate for up to four days.
- Reheat individual slices in the microwave for 20 seconds to recreate that fresh baked experience
- The pie freezes beautifully before or after baking, though I prefer freezing it unbaked and baking fresh
- Always place a baking sheet on the rack below your pie to catch any potential drips and save your oven from a sticky mess
 Save
Save There's something almost meditative about the rhythm of peeling and slicing apples, the methodical nature of it all. Whatever season you're making this in, however your day went, that first warm bite somehow makes everything feel exactly right.
Common Recipe Questions
- → What type of apples work best?
-
Granny Smith apples are ideal because their tartness balances the sugar and they hold their shape during baking. Other good options include Honeycrisp, Braeburn, or Jonagold for a mix of sweet and tart flavors.
- → Why must the butter be cold?
-
Cold butter creates small flakes of fat in the dough that melt during baking, leaving behind tiny air pockets. This results in a flaky, tender crust. Warm butter blends into the flour, making the pastry tough rather than light.
- → Can I make this ahead of time?
-
Yes! The dough can be prepared and refrigerated up to 2 days ahead or frozen for up to 3 months. You can also assemble the entire pie and refrigerate it unbaked for up to 24 hours before baking.
- → How do I know when it's done?
-
The pie is ready when the crust is deep golden brown and the filling is bubbling visibly through the steam vents. If the crust browns too quickly, tent it loosely with foil during the last 15 minutes of baking.
- → Why let it cool before slicing?
-
Allowing the pie to cool for at least 2 hours lets the fruit filling thicken and set properly. Cutting too soon will result in a runny filling that spills out. The wait is worth it for clean, beautiful slices.
- → Can I freeze the finished pie?
-
Absolutely. Bake the pie completely, cool it thoroughly, wrap it tightly in plastic and foil, then freeze for up to 3 months. Thaw overnight in the refrigerator and reheat at 350°F for 15-20 minutes to restore crispness.